
accu-chek guide blood glucose meter
Accu-Chek Guide Blood Glucose Meter: A Comprehensive Guide

This detailed guide offers comprehensive instructions for the Accu-Chek Guide meter‚ covering setup‚ testing‚ understanding results‚ and troubleshooting‚ utilizing available manuals and guides.
The Accu-Chek Guide meter is a user-friendly blood glucose monitoring system designed for individuals managing diabetes. This device empowers you to proactively monitor your blood sugar levels‚ facilitating informed healthcare decisions. Accu-Chek prioritizes accuracy and simplicity‚ offering a streamlined testing experience.
This meter‚ accompanied by detailed user manuals available for download – including English and Spanish versions – ensures a clear understanding of its operation. The system includes the meter itself‚ test strips‚ a lancing device‚ and batteries‚ providing a complete starting point.
Whether you are newly diagnosed or experienced in self-monitoring‚ the Accu-Chek Guide aims to integrate seamlessly into your daily routine‚ promoting better diabetes management through accessible and reliable data. Explore the comprehensive guides to maximize your experience.
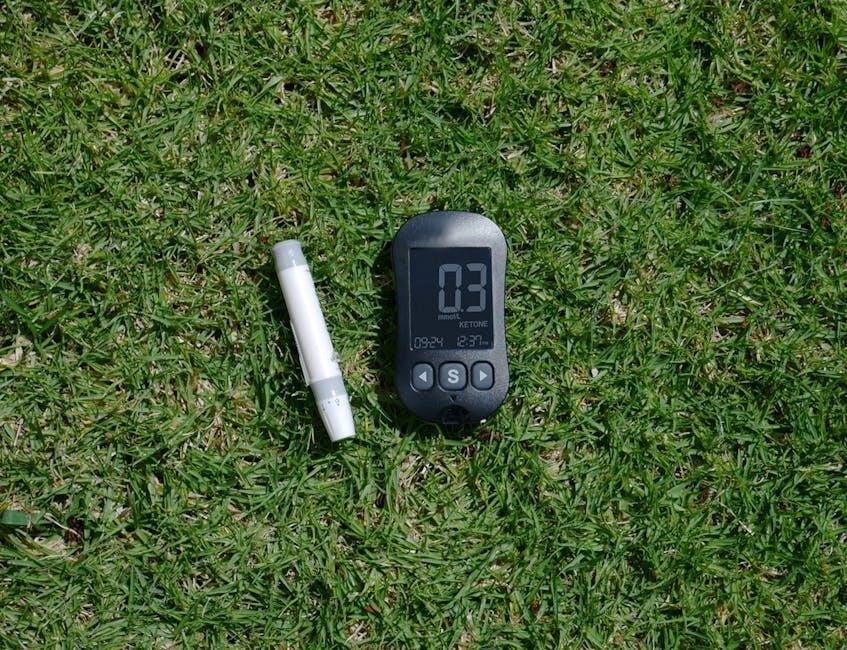
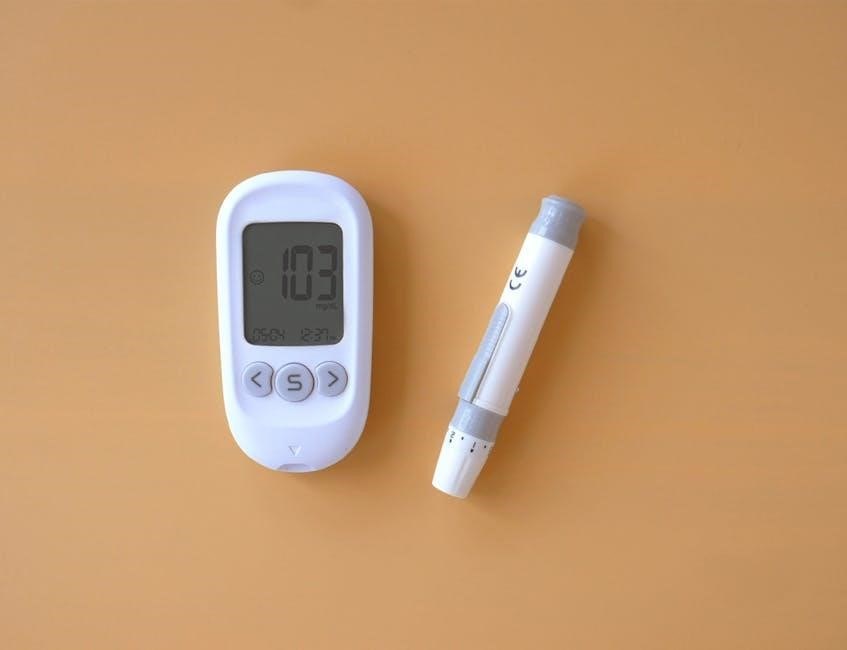
What’s Included in the Box
Upon opening your Accu-Chek Guide package‚ you’ll find everything needed to begin monitoring your blood glucose. The core component is‚ of course‚ the Accu-Chek Guide meter itself‚ designed for ease of use and accurate readings. Included are batteries to power the device‚ ensuring immediate functionality.
A crucial element is a supply of Accu-Chek Guide test strips‚ essential for conducting blood glucose tests. The package also contains a lancing device‚ used to obtain a small blood sample‚ along with lancets for comfortable testing.
Furthermore‚ you’ll receive a quick reference guide and access to the full user manual (available online in multiple languages)‚ providing detailed instructions. The Accu-Chek Guide control solution is also included for quality checks‚ guaranteeing reliable results.
Key Features of the Accu-Chek Guide
The Accu-Chek Guide meter boasts several features designed for a seamless user experience. Its spill-resistant bottle ensures test strip integrity‚ minimizing waste and maximizing accuracy. The meter’s wide test strip design facilitates easy handling‚ even for those with limited dexterity.
Data management is simplified with a large‚ clear display and a memory capable of storing numerous readings. This allows for convenient review of blood glucose trends. The meter also supports data downloading to a computer‚ aiding in comprehensive analysis.
Furthermore‚ the Accu-Chek Guide offers Bluetooth connectivity for effortless data transfer. Its intuitive interface and readily available user manuals contribute to its user-friendliness‚ making self-monitoring accessible.
Setting Up Your Accu-Chek Guide Meter
Proper setup involves inserting batteries‚ setting the correct date and time‚ and customizing meter settings for personalized monitoring‚ as detailed in the user manual.
Inserting the Batteries
The Accu-Chek Guide meter requires batteries to operate effectively. Typically‚ the meter utilizes standard batteries‚ and the user manual provides specific details regarding the battery type needed. To insert the batteries‚ locate the battery compartment‚ usually on the back or bottom of the meter. Gently slide off the battery compartment cover.
Insert the batteries‚ ensuring correct polarity – matching the positive (+) and negative (-) signs as indicated inside the compartment. Once the batteries are securely in place‚ carefully slide the battery compartment cover back on until it clicks shut. The meter should now power on‚ indicating successful battery installation. Always refer to the manual for visual guidance and safety precautions.
Setting the Date and Time
Accurate date and time settings are crucial for proper data logging and tracking of your blood glucose readings with the Accu-Chek Guide meter. To set the date and time‚ navigate to the “Settings” menu on the meter’s display. This is usually accessed through the meter’s buttons‚ as detailed in the user manual.
Use the up and down arrows to adjust the year‚ month‚ day‚ hour‚ and minute. Confirm each selection by pressing the designated button. Ensure the correct AM or PM designation is selected. Properly setting the date and time allows for accurate record-keeping and facilitates better management of your diabetes. Refer to the manual for specific button combinations and on-screen prompts.
Adjusting Meter Settings
The Accu-Chek Guide meter offers customizable settings to personalize your testing experience. Access the “Settings” menu via the meter’s buttons‚ as outlined in the user manual. Here‚ you can adjust units of measurement between mg/dL and mmol/L‚ catering to your preference or healthcare provider’s requirements.
You may also find options to adjust the meter’s language‚ sound volume‚ and backlight settings. Some models allow for setting high and low glucose alerts‚ providing timely notifications. Explore these options to tailor the meter to your needs. Remember to save any changes made within the settings menu. Consult the manual for detailed instructions on each adjustable parameter.

Performing a Blood Glucose Test
Testing with the Accu-Chek Guide involves preparing the lancing device‚ obtaining a blood sample‚ applying it to a test strip‚ and reading the results accurately.
Preparing the Lancing Device
The Accu-Chek Guide lancing device requires careful preparation for a comfortable and accurate blood sample. First‚ remove the protective cap. Then‚ insert a new‚ sterile lancet firmly into the lancing device‚ twisting to secure it. Adjust the depth setting according to your skin type – lower settings are generally suitable for softer skin‚ while higher settings may be needed for thicker skin.
Remember to always use a new lancet for each test to prevent infection and ensure optimal performance. Before testing‚ prime the lancing device by pressing the release button once to eject and retract the lancet. This prepares the device for a quick and efficient finger prick. Proper preparation minimizes discomfort and helps obtain an adequate blood sample for accurate glucose monitoring.
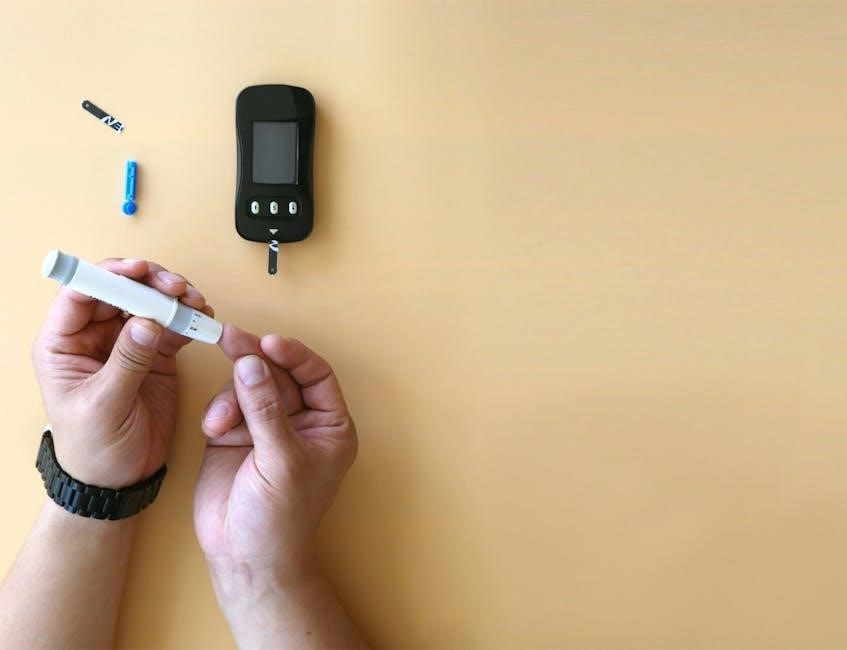
Obtaining a Blood Sample
To obtain a blood sample with the Accu-Chek Guide‚ gently massage your fingertip to encourage blood flow. Avoid squeezing too hard‚ as this can affect the accuracy of the result. Select a puncture site on the side of your fingertip – this area is generally less sensitive.
Press the primed lancing device firmly against the chosen site and press the release button. A small drop of blood will appear. If the blood flow is insufficient‚ gently massage the finger again‚ avoiding excessive squeezing. Wipe away the first drop of blood with a clean‚ dry cloth‚ as it may contain tissue fluid that could interfere with the test. A sufficient sample is crucial for accurate readings.
Applying the Blood to the Test Strip
Carefully insert an Accu-Chek Guide test strip into the meter‚ ensuring the strip is fully seated. The meter will automatically turn on and display a readiness symbol. Gently touch the drop of blood to the designated sample area on the test strip – do not smear or apply blood to the sides.
The strip will draw the required amount of blood automatically via capillary action. Avoid adding more blood than necessary‚ as this can cause errors. Hold the strip steady until the meter confirms sample uptake‚ usually indicated by a visual cue. Ensure adequate lighting for proper strip reading and accurate results.
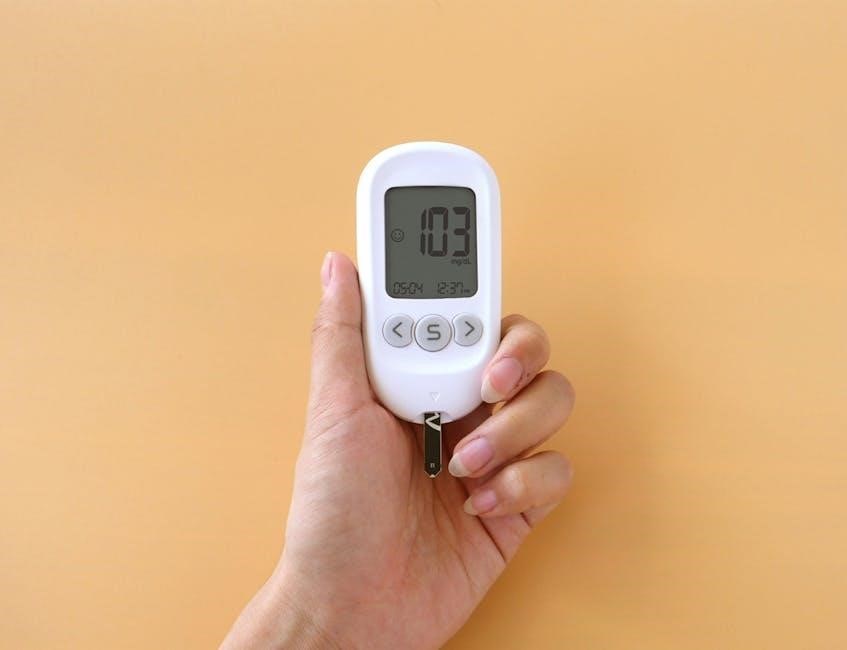
Reading Your Blood Glucose Result
After applying the blood‚ the Accu-Chek Guide meter will begin analyzing the sample‚ displaying a countdown timer during the process. Within seconds‚ your blood glucose result will appear clearly on the meter’s screen‚ expressed in mg/dL or mmol/L‚ depending on your settings.
The meter may also display additional information‚ such as the time of the test and any relevant symbols indicating high or low readings. Review the result carefully and compare it to your target range. Remember to record your readings for tracking and discussion with your healthcare provider.

Understanding Your Results
Interpreting your Accu-Chek Guide readings requires understanding target ranges‚ recognizing high/low values‚ and acknowledging factors influencing glucose levels for effective management.
Target Blood Glucose Ranges
Establishing appropriate blood glucose targets is crucial for effective diabetes management with the Accu-Chek Guide meter. Generally‚ for individuals without diabetes‚ fasting blood glucose should be less than 100 mg/dL‚ and two hours after eating‚ it should be less than 140 mg/dL.
For people with diabetes‚ target ranges are often individualized‚ but a common goal is a fasting blood glucose of 80-130 mg/dL and a post-meal level below 180 mg/dL. These ranges can vary based on individual health status‚ age‚ and other medical conditions.
Regular monitoring with your Accu-Chek Guide helps you and your healthcare provider adjust treatment plans to maintain optimal glucose control and minimize long-term health risks. Always discuss your specific target ranges with your doctor.
High and Low Blood Glucose Readings
Understanding high and low blood glucose readings obtained with your Accu-Chek Guide meter is vital. Hyperglycemia (high blood sugar)‚ generally above 180 mg/dL‚ can occur due to missed medication‚ overeating‚ or illness. Symptoms include increased thirst‚ frequent urination‚ and blurred vision.
Hypoglycemia (low blood sugar)‚ typically below 70 mg/dL‚ can result from excessive insulin‚ skipped meals‚ or strenuous exercise. Symptoms include shakiness‚ sweating‚ dizziness‚ and confusion.
Promptly address both conditions. For lows‚ consume 15-20 grams of fast-acting carbohydrates. For highs‚ follow your healthcare provider’s instructions. Consistent monitoring with the Accu-Chek Guide aids in recognizing patterns and preventing severe episodes.
Factors Affecting Blood Glucose Levels
Numerous factors influence blood glucose readings obtained with the Accu-Chek Guide meter. Diet plays a significant role; carbohydrate intake directly impacts levels. Physical activity increases insulin sensitivity‚ potentially lowering glucose. Stress hormones can elevate blood sugar‚ even without dietary changes.
Illness‚ such as a cold or flu‚ often causes glucose fluctuations. Medications‚ including steroids and certain diuretics‚ can also affect readings. Hydration levels and even the timing of your tests relative to meals are important considerations.
Keeping a log alongside your Accu-Chek Guide results‚ noting these factors‚ helps identify personal patterns and optimize diabetes management.

Accu-Chek Guide Test Strips
Specifically designed for the Accu-Chek Guide meter‚ these strips ensure accurate results; proper storage and handling are crucial for reliable blood glucose monitoring.
Using Accu-Chek Guide Test Strips
To utilize Accu-Chek Guide test strips effectively‚ ensure your hands are clean and dry before handling. Insert a strip into the meter with the gray tab facing up‚ and the meter will automatically turn on. The strip’s application area should be fully covered with a small‚ hanging drop of blood. Avoid applying too little or too much blood‚ as this can lead to inaccurate readings.
The meter confirms proper sample application‚ displaying a readiness symbol. Do not reuse test strips‚ and always check the expiration date before use. Discard used strips safely according to local regulations. Refer to the user manual for detailed instructions and visual aids to ensure correct strip usage and optimal performance of your Accu-Chek Guide system.
Storing Test Strips Properly
Proper storage of Accu-Chek Guide test strips is crucial for maintaining their accuracy and reliability. Always store the strips in their original vial‚ tightly closed‚ in a cool‚ dry place. Avoid exposing them to direct sunlight‚ heat‚ or humidity‚ as these conditions can degrade the test strip’s chemical components.
Do not store strips in the bathroom or near water sources. Keep them out of reach of children and pets. Check the expiration date on the vial before each use; expired strips may yield inaccurate results. Never transfer strips to another container‚ as this can compromise their integrity. Following these guidelines ensures optimal performance and dependable blood glucose monitoring.
Troubleshooting Test Strip Issues
Encountering issues with Accu-Chek Guide test strips? First‚ ensure the strips haven’t expired and are stored correctly – cool‚ dry‚ and in their original vial. If you receive an error message‚ consult the meter’s user manual for specific codes and solutions. A common problem is insufficient blood sample; retest with a larger drop.
If readings seem consistently inaccurate‚ verify the strip lot number matches the meter’s settings (if applicable). Contaminated or damaged strips should never be used. If problems persist‚ contact Accu-Chek support for assistance‚ referencing the error message or issue details. Proper strip handling is vital for reliable results.
Meter Maintenance and Care
Regular cleaning and proper data management are crucial for optimal performance. Review the user manual for detailed instructions on cleaning and data downloading procedures.
Cleaning the Accu-Chek Guide Meter
Maintaining cleanliness is vital for accurate readings and extending the life of your Accu-Chek Guide meter. Always disconnect the meter from any power source before cleaning. Gently wipe the exterior of the meter with a slightly damp cloth. Avoid using harsh chemicals‚ abrasive cleaners‚ or excessive moisture‚ as these can damage the device.
Pay particular attention to the test strip port‚ ensuring no blood or debris remains. A soft‚ dry cloth can be used to carefully clean this area. Never immerse the meter in water or any other liquid. Regularly cleaning your meter‚ as outlined in the user manual‚ helps prevent contamination and ensures reliable performance. Refer to the detailed User Manual for specific cleaning recommendations.
Data Memory and Reviewing Results
The Accu-Chek Guide meter conveniently stores your blood glucose readings‚ allowing you to track your progress over time. This feature enables you to identify trends and patterns in your blood sugar levels. You can access and review your stored results directly on the meter’s display‚ navigating through previous readings using the meter’s buttons.
The meter typically stores a significant number of readings‚ often with date and time stamps. Regularly reviewing your data‚ as detailed in the User Manual‚ can help you and your healthcare provider make informed decisions about your diabetes management plan; Understanding how to access and interpret this data is crucial for effective self-monitoring.
Downloading Data to a Computer
The Accu-Chek Guide meter allows you to transfer your stored blood glucose data to a computer for more detailed analysis and record-keeping. This is typically achieved using a compatible data cable and software‚ often available for download from the Accu-Chek website. The software enables you to visualize your data in graphs and charts‚ providing a comprehensive overview of your blood sugar control.
Downloading your data facilitates sharing information with your healthcare provider‚ aiding in collaborative diabetes management. Refer to the User Manual for specific instructions on connecting the meter‚ installing the software‚ and transferring your readings. Regularly backing up your data ensures you don’t lose valuable insights into your health.

Troubleshooting Common Issues
Resolve typical problems like error messages‚ meter failures‚ or inaccurate readings by consulting the User Manual and Accu-Chek support resources for solutions.
Error Messages and Their Meanings
Understanding error messages on your Accu-Chek Guide meter is crucial for accurate monitoring. The meter displays codes indicating specific issues requiring attention. For example‚ an error might signal a problem with the test strip‚ indicating it’s damaged‚ expired‚ or improperly inserted.
Other codes could point to insufficient blood sample size‚ requiring you to re-test. Some messages relate to internal meter malfunctions‚ potentially needing professional support. Always refer to your User Manual – a 22.53 MB PDF download available on the Accu-Chek website – for a complete list and detailed explanations of each error code. Ignoring these messages can lead to unreliable results‚ impacting your diabetes management.
Properly addressing these errors ensures accurate readings and effective self-monitoring.
Meter Not Turning On
If your Accu-Chek Guide meter fails to power on‚ several factors could be at play. First‚ verify the batteries are correctly installed‚ ensuring proper polarity. Even new batteries might be faulty‚ so try a fresh set from a reliable brand. A completely drained battery is a common cause‚ especially with infrequent use.
Inspect the battery compartment for any corrosion or debris that might impede contact. If the issue persists‚ consult the User Manual (available as a 22.53 MB PDF download) for troubleshooting steps. In rare cases‚ an internal meter malfunction could be the culprit‚ requiring contact with Accu-Chek support. Avoid attempting to disassemble the meter yourself‚ as this voids the warranty.
Always prioritize battery checks before seeking further assistance.
Inaccurate Readings
Obtaining consistently inaccurate blood glucose readings with your Accu-Chek Guide meter requires careful investigation. Ensure you’re using Accu-Chek Guide test strips that haven’t expired and are stored correctly – in a cool‚ dry place. Confirm the test strip port is clean and free of debris.
Proper testing technique is crucial; insufficient blood sample size or applying blood to the wrong area of the strip can cause errors. Compare your meter’s results with a lab test if concerns persist. Refer to the comprehensive User Manual (PDF download available) for detailed guidance.
Contact Accu-Chek support if inaccuracies continue‚ as a faulty meter may need replacement.
Resources and Support
Access the Accu-Chek website for extensive support‚ downloadable manuals (English & Spanish PDFs available)‚ and a comprehensive FAQ section for your Guide meter.
Accu-Chek Website and Support
The official Accu-Chek website serves as a central hub for all your support needs regarding the Accu-Chek Guide blood glucose meter. Here‚ you’ll find a wealth of information designed to assist you in managing your diabetes effectively.
Comprehensive resources include downloadable user manuals in multiple languages – both English and Spanish PDF versions are readily available for immediate access. These manuals provide detailed instructions on every aspect of meter operation‚ from initial setup to troubleshooting common issues.
Beyond the manuals‚ the website offers a dedicated support section where you can find answers to frequently asked questions (FAQ)‚ explore helpful articles‚ and even connect with a customer support representative if you require personalized assistance. Staying informed is key‚ and the Accu-Chek newsletter keeps you updated on the latest product information and diabetes management tips.
Downloading User Manuals
Accessing the Accu-Chek Guide meter’s user manuals is straightforward through the official Accu-Chek website. Several PDF versions are available for download‚ catering to different user preferences and language needs. You can easily obtain the Accu-Chek Guide Meter Manual in English‚ a substantial file weighing 22.53 MB‚ providing exhaustive guidance.
For Spanish-speaking users‚ a dedicated Spanish language manual is also offered‚ mirroring the English version in detail but weighing slightly more at 22.58 MB. These downloadable manuals encompass everything from initial setup and testing procedures to data management and troubleshooting.
Downloading these resources ensures you always have a readily available‚ comprehensive guide at your fingertips‚ allowing you to confidently navigate all aspects of your Accu-Chek Guide meter and optimize your blood glucose monitoring experience.
Frequently Asked Questions (FAQ)
Many common questions regarding the Accu-Chek Guide meter are addressed through a dedicated FAQ section on the Accu-Chek website. These FAQs cover a wide range of topics‚ from initial setup and troubleshooting error messages to understanding test strip storage and data downloading procedures.
Users frequently inquire about error codes‚ meter accuracy‚ and compatibility with different test strip lots. The FAQ provides clear‚ concise answers‚ often directing users to specific sections within the comprehensive user manual for more detailed information.
Exploring the FAQ is a valuable first step when encountering issues‚ potentially resolving problems quickly without needing to contact customer support. It’s a readily accessible resource designed to empower users and enhance their experience with the Accu-Chek Guide system.